
A Practical Guide to Using Soil Tests, Field Observations, and Farm Records for Smarter Decisions
Soil tests are most valuable when they help answer a real management question. Whether a field is yielding unevenly, holding water after rain, or receiving more fertilizer than the crop may need, a measurement framework for soil health can help turn observations into a clearer plan.
The most useful approach begins with what farmers can already see in the field and then uses testing to confirm, refine, or challenge those observations. The goal is not to collect numbers for their own sake. Good soil testing connects laboratory results with field conditions, crop goals, input costs, and records from previous seasons.
When those pieces are reviewed together, farmers can make decisions with more confidence. It also helps distinguish between a temporary problem caused by a difficult season and a repeatable issue that deserves a longer-term management response.
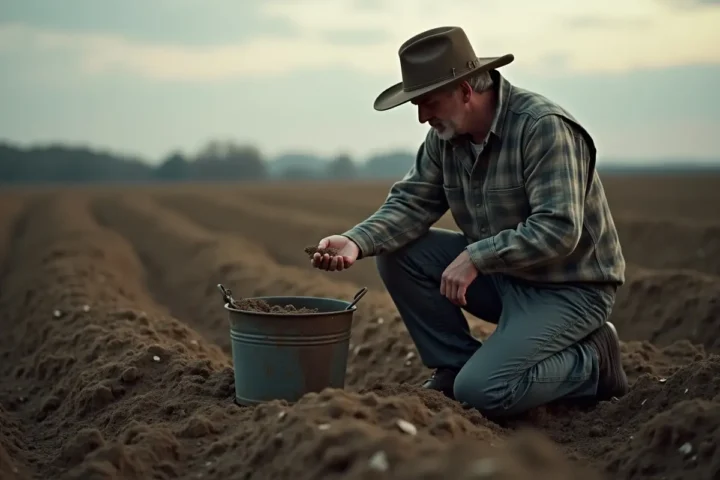
Start With the Question Behind the Test
Before pulling a soil core, define the decision the test should support. A clear question prevents unnecessary testing and makes the final report easier to interpret. For example, a producer may want to compare a low-producing zone with a nearby productive area, evaluate whether a lime application is justified, or investigate shallow rooting in a compacted field.
Ask four practical questions:
- What problem or opportunity needs attention?
- Which field, zone, or crop shows the strongest evidence?
- What management decision could change because of the results?
- What result would make the cost of changing management worthwhile?
Writing the question down can be worthwhile, especially when several people help manage the operation. A short note, such as “compare nutrient availability and compaction between the east slope and lower field,” creates a useful reference point when samples are collected and results arrive later.
Understand What a Standard Soil Test Can Show
A routine fertility report commonly includes measurements such as pH, organic matter, phosphorus, potassium, and sometimes salinity or cation exchange capacity. These results can support nutrient and lime decisions, but they do not guarantee a yield outcome. Weather, crop genetics, planting conditions, pest pressure, water availability, and management timing also affect crop performance.
Soil test values should also be interpreted in light of the laboratory’s stated interpretation and local crop recommendations. A value that appears high or low without context may not translate directly into a management change. The intended crop, realistic yield goal, nutrient source, and expected application timing can all affect how a recommendation is used.
Soil health is broader than fertility alone. The USDA Natural Resources Conservation Service describes physical, chemical, and biological indicators as useful tools for evaluating how well soil performs its functions. That perspective is important because a field can have adequate nutrient levels while still struggling with compaction, poor infiltration, surface crusting, or limited root growth.
Look Beyond Nutrients
Field observations provide context that a standard lab report may not capture. Examine water movement after rainfall, the ease of pushing a probe into the soil, root depth, soil aggregation, residue breakdown, visible erosion, and the presence of earthworms.
None of these observations should be treated as a complete diagnosis on its own, but together they can point to the condition most likely to limit production. It can be helpful to inspect both a problem area and a nearby area that is performing well.
Differences in root structure, residue cover, soil firmness, or standing water may reveal a pattern that is not obvious from a field average. Photos taken from the same locations during the season can also make later comparisons easier. Match additional testing to the concern. Infiltration checks and penetration resistance readings may help investigate compaction or drainage issues.
Tissue testing can help compare nutrient uptake in healthy and weak crop areas. Biological tests, such as respiration or active carbon measurements, may provide useful information when the goal is to monitor changes in soil biological activity over time.
Collect Samples That Represent the Field
A laboratory can only analyze the soil it receives. Sampling near a gate, livestock concentration area, old fencerow, road edge, manure pile, wet hole, or unusually eroded spot can distort results if that area is meant to represent the whole field. Divide variable fields into sensible management zones based on soil type, topography, yield history, drainage, or crop performance.
- Use clean tools and a clean plastic bucket.
- Take samples at a consistent depth suited to the crop and local recommendation system.
- Collect multiple cores from each representative zone.
- Mix the cores thoroughly into one composite sample for that zone.
- Label every sample with the field name, zone, depth, date, and intended crop.
- Keep notes on recent manure, fertilizer, lime, irrigation, or unusual weather events.
Consistent depth and multiple cores are central to dependable results. Guidance on building a composite soil sample from representative cores also reinforces the importance of making sampling plans before entering the field. Sampling at roughly the same time of year across testing cycles can further reduce confusion caused by seasonal changes in soil moisture, temperature, and nutrient dynamics.
Turn the Report Into a Farm Plan
After receiving the results, rank the issues rather than trying to fix every number at once. Start with the condition most likely to limit crop performance or create unnecessary cost. A low pH result may justify a lime plan. A compacted headland may warrant a traffic management review. Uneven nutrient levels may support zone-based applications rather than a uniform field rate.
A practical action plan can follow this sequence:
- Identify the leading limitation.
- Estimate the expected cost and operational impact of a response.
- Select one manageable change.
- Try it first on a small, clearly marked area when possible.
- Record the treatment, timing, weather, and field conditions.
- Compare the treated area with a similar untreated area.
Clearly marking trial areas matters. A flag, GPS point, field map, or simple written description can prevent a useful test from being lost by harvest. Whenever possible, keep other management practices similar between treated and untreated areas so the comparison focuses on the change being evaluated.
The lowest-cost option is not automatically the best. The better choice addresses the main limitation without creating another problem, such as applying unnecessary nutrients or making a field pass when soils are vulnerable to compaction.
Connect Soil Data With Economics, Water, and Weather
Soil information becomes more useful when it is paired with farm records. Keep a simple entry for each field that includes the test date, major finding, planned action, application cost, crop, yield result, and next review date. Over time, these notes can show whether a practice reduced inputs, improved consistency, or failed to produce a useful return. Weather and water records are equally important.
Two fields may receive the same fertilizer rate, yet perform differently during a dry period because one allows water to enter the profile more effectively or supports deeper roots. Rainfall totals, irrigation records, ponding observations, and crop stress notes can explain patterns that a single soil test cannot. Economic records do not need to be complicated to be useful.
Tracking product cost, labor, fuel, equipment passes, and any yield or quality difference can help determine whether a practice fits the operation. This is particularly important when a change may provide benefits over several seasons rather than immediately after one application.
Track Change Across Several Seasons
One soil test is a snapshot. Repeated measurements show direction. For meaningful comparisons, use the same laboratory methods, sampling depth, field zones, and sampling period whenever practical. Watch for trends in organic matter, infiltration, crop emergence, rooting depth, yield consistency, fertilizer use, irrigation needs, erosion, and surface sealing.
Not every indicator will change quickly, and year-to-year weather can affect field observations. A longer record is often more informative than reacting strongly to one result. Reviewing trends at the same point in the crop rotation can also make comparisons more meaningful.
Use Technology Without Losing Field Knowledge
GPS sampling, yield maps, satellite imagery, moisture sensors, drones, and digital records can help identify patterns and document management zones. Still, technology is most useful when it supports a specific decision. A well-maintained spreadsheet, field map, and repeatable sampling process can be more valuable than a complex platform that produces data no one has time to review.
Common Mistakes to Avoid
- Testing only after a problem has become severe.
- Using one sample for a highly variable field.
- Changing several practices at the same time, making results hard to interpret.
- Ignoring sampling depth, timing, and recent applications.
- Comparing reports from different methods without checking whether the results are comparable.
- Focusing on one number while overlooking water movement, roots, and field history.
- Failing to record costs and production outcomes after making a change.
Questions to Ask the Laboratory
- Which methods are used for the requested tests?
- What sampling depth and sample volume are recommended?
- Can the laboratory perform physical or biological measurements when needed?
- Will the report explain how results relate to the crop and management goal?
- Can future results be compared using the same methods?
Conclusion
Soil testing works best as part of an ongoing decision-making process rather than as a one-time task. Collect representative samples from the right areas, observe what is happening in the field, compare laboratory results with previous records, and make changes that can be measured over time.
Regular testing can help identify nutrient deficiencies, pH imbalances, salinity concerns, and other conditions that may affect plant growth and soil performance. It can also help growers avoid unnecessary applications by showing which nutrients are already available in adequate amounts.
When results are combined with field observations, weather patterns, crop history, irrigation practices, and fertilizer records, they provide a clearer picture of how the soil is changing. With consistent testing and practical follow-through, soil data can support more efficient nutrient use, stronger water management, healthier crop development, more informed planting decisions, and responsible long-term stewardship of the land.