
Getting a Roof Ready for Winter Season
Preparing your roof for winter should begin before the first freeze to prevent costly problems. A late-fall check does not need to be complicated, but it does need to be specific: look for defects, clear water paths, confirm ventilation, and fix anything that can let moisture enter the roof assembly.
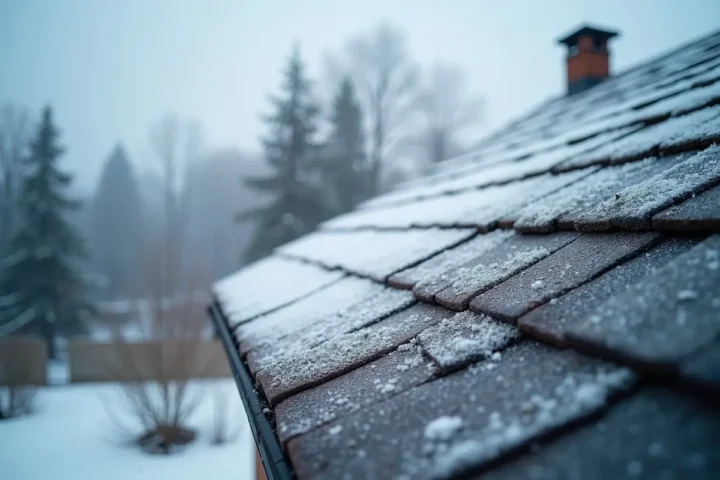
Start with a roof inspection before temperatures stay below 40°F
The best time to inspect is early to mid-fall, when daytime temperatures are above 40°F and roofing sealants can still bond properly. Many asphalt roofing cement and sealant products are not intended for cold application below that range, and shingles become more brittle as temperatures drop.
Walk around the house first. Use binoculars if the roof is steep or two stories high. Look for missing shingles, curled edges, exposed nail heads, cracked pipe boots, lifted flashing, and dark streaks that may indicate moisture paths. On asphalt shingles, check whether granules are collecting at the bottoms of downspouts. A light dusting of granules is normal on newer shingles, but piles that look like coarse sand can mean the shingle surface is wearing out.
Inside, check the attic on a bright day with the lights off. Pinholes of daylight near vents, roof penetrations, or ridge lines deserve attention. The Insurance Institute for Business & Home Safety recommends sealing roof deck joints and penetrations as part of a stronger defense against wind-driven rain, because water often enters through small openings before it becomes visible on ceilings.
If you find soft decking, stained rafters, active drips, or mold-like growth larger than a few square feet, bring in a licensed roofer rather than treating the inspection as a weekend repair.
Clean gutters and confirm the drainage path
Gutters matter in winter because they control where meltwater goes. A clogged gutter holds water against the roof edge, and that water can freeze into a heavy trough of ice. One gallon of water weighs about 8.34 pounds, so a 20-foot gutter loaded with slush can put serious strain on fasteners and fascia boards.
Clean gutters after most leaves have fallen, usually late October to late November in many cold-weather regions. If your home sits under maples, oaks, or pines, check again two to three weeks later. Pine needles are narrow enough to slip through many basic gutter guards and can create dense mats at downspout outlets.
Downspouts should discharge at least 5 feet away from the foundation. This distance helps keep water from soaking the soil beside basement walls, then freezing and expanding. If your downspouts connect to underground drains, run water through them with a hose before freezing weather. Slow drainage can mean roots, silt, or crushed corrugated pipe.
Gutter pitch also deserves a quick check. A common target is about 1/4 inch of slope for every 10 feet of gutter run toward the downspout. Standing water after a light rain shows that the pitch, hangers, or sagging sections need correction before ice adds weight.
Deal with ice dam risks before the first snow
An ice dam forms when upper roof areas warm enough to melt snow, while the lower edge remains below freezing. Meltwater runs downward, refreezes near the eaves, and can back up under shingles. The University of Minnesota Extension explains that ice dams are mainly caused by heat loss into the attic, not by gutters alone.
The key is to keep the roof deck closer to the outdoor temperature. That means air sealing, insulation, and ventilation must work together. Many homeowners focus only on adding insulation, but warm indoor air leaking through ceiling gaps can carry moisture into the attic and heat the underside of the roof.
Air sealing comes before adding insulation
Seal gaps around attic hatches, plumbing stacks, electrical penetrations, recessed lights, bath fan housings, and chimney chases. Use fire-rated caulk or sheet metal where required near heat sources. Around chimneys, building codes often require clearance to combustibles, so do not pack fiberglass directly against masonry without proper flashing and fire-safe materials.
The U.S. Department of Energy notes that air sealing attic bypasses is usually one of the most effective ways to reduce heat loss. A gap as small as 1/4 inch around a plumbing pipe may look harmless, but dozens of small leaks can move a surprising amount of warm, moist air.
Insulation must match your climate zone
Attic insulation targets depend on location. The U.S. Department of Energy commonly recommends roughly R-49 to R-60 in many northern climate zones and R-30 to R-49 in warmer zones. If you can see the tops of ceiling joists in a cold-climate attic, you likely do not have enough insulation.
Do not block soffit vents with insulation. Use baffles at the eaves to maintain an air channel from soffit to roof deck. This channel helps cold air enter low and exit high, reducing warm spots that feed ice dams.
Ventilation needs balance, not just more vents
The International Residential Code uses attic ventilation ratios such as 1 square foot of net free vent area for every 150 square feet of attic floor area, with exceptions that allow 1:300 when balanced high and low ventilation is installed. “Net free area” is the actual open area after screens and louvers reduce airflow.
A roof with ridge vents but blocked soffits will not ventilate correctly. Air may short-cycle near the ridge instead of washing the underside of the roof deck. A roof ready for winter should have clear intake vents, open exhaust vents, and no bath or dryer ducts dumping humid air into the attic.
Fix flashing, pipe boots, and roof penetrations
Winter leaks often start at transitions rather than in the open field of shingles. Flashing around chimneys, sidewalls, skylights, and dormers moves slightly as materials expand and contract. Freeze-thaw cycles can open small separations that were barely visible in September.
Pipe boots are another common failure point. The rubber collar around a plumbing vent can crack from ultraviolet exposure. Once it splits, water follows the pipe through the roof deck and may drip inside a wall cavity rather than directly onto a ceiling. That makes the leak harder to trace.
Chimney flashing should include step flashing along the sides and counterflashing cut into mortar joints. A bead of caulk smeared over old flashing is not a durable winter repair. Caulk can help seal a minor joint, but it should not replace layered metal flashing.
If a roof penetration is leaking now, repair it before snow cover hides the source. Professional replacement of a basic plumbing vent boot often falls in the range of $150 to $400, depending on roof height, access, and shingle condition.
Choose the right level of winter preparation
Not every roof needs the same amount of work. A newer roof with clean gutters and a dry attic may only need inspection and minor sealing. An older roof with past ice dams needs a deeper plan.
| Situation | Best option | Conditions that point to it |
|---|---|---|
| Roof is under 8 years old, no stains, no missing shingles | DIY visual inspection and gutter cleaning | Roof is walkable or safely visible from ground, gutters drain freely, attic is dry |
| Roof is 8 to 18 years old with minor wear | Professional maintenance visit | A few lifted shingles, aging sealant, cracked pipe boot, or loose flashing |
| Repeated ice dams or attic frost | Air sealing and insulation assessment | Snow melts unevenly, icicles form at eaves, attic smells musty, bath fans vent into attic |
| Roof is near end of service life | Roofing contractor inspection | Widespread granule loss, curled shingles, soft decking, multiple leak points |
Asphalt shingle roofs often last about 20 to 30 years, but exposure changes that range. South-facing slopes age faster because of sun and heat. Roof planes below overhanging trees stay damp longer, especially where leaves collect in valleys.
For a roof ready for winter, match the work to the failure risk. A single cracked boot is a targeted repair. A cold upstairs room under an attic with frost on nail tips calls for air sealing and ventilation work. A roof with several missing shingles after a windstorm needs more than seasonal maintenance.
Prepare valleys, low-slope areas, and roof edges
Valleys carry more water than flat roof planes. Leaves, seed pods, and twigs can form a dam in a valley, especially where two steep slopes meet above a shallow porch roof. Clear debris by hand or with a soft roof brush; pressure washing can strip asphalt granules and drive water under laps.
Low-slope sections need extra attention because shingles are designed for roofs with adequate pitch. Many asphalt shingle manufacturers require special underlayment when slopes fall between 2:12 and 4:12, meaning the roof rises 2 to 4 inches for every 12 inches of horizontal run. Below 2:12, asphalt shingles are usually not appropriate.
Roof edges should be checked for drip edge metal. Drip edge helps direct water into the gutter instead of behind it. The International Residential Code requires drip edge for asphalt shingle roofs in many applications, with metal extending at least 2 inches onto the roof deck and installed at eaves and rakes.
If your area gets frequent ice dams, ask whether ice barrier membrane is present. Code commonly requires ice barrier in regions with a history of ice forming along eaves, extending from the lowest roof edge to at least 24 inches inside the exterior wall line.
Trim branches and reduce roof impact hazards
Branches should not scrape shingles in the wind. A good practical clearance is 6 to 10 feet between branches and the roof surface, especially near valleys and gutters. Overhanging limbs drop leaves, shade shingles, and can break under wet snow loads.
The National Weather Service classifies heavy snow by water content as much as depth. Wet snow can weigh several times more than dry powder. A branch that survives light snow may snap during a storm that brings dense, wet accumulation followed by freezing rain.
Tree work near service lines, steep ground, or large limbs should be handled by a qualified tree professional. For small branches you can safely reach from the ground, use a pole saw and make clean cuts outside the branch collar. Do not climb onto a snowy or frosty roof to cut limbs.
Moss and algae also matter before winter. Moss holds moisture against shingles and can lift shingle edges as it thickens. Avoid scraping aggressively with metal tools. Zinc or copper strips near the ridge can reduce future growth as rainwater carries trace metal ions down the roof.
Stock safe winter tools before storms arrive
Snow removal is not always necessary, but the right tools help when buildup becomes risky. A roof rake with a telescoping handle lets you remove snow from the ground. Choose one with small rollers or a nonmetal blade to reduce shingle damage. Leave 1 to 2 inches of snow on the roof instead of scraping to the surface.
Do not use rock salt on asphalt shingles. Sodium chloride can corrode metal flashing, stain siding, and harm plants below. Calcium chloride ice melt is less damaging in limited use, but it should be placed in fabric tubes or socks across an ice dam rather than scattered loose across the roof.
Snow load concerns depend on roof design, snow density, and local building requirements. The American Society of Civil Engineers publishes ASCE 7, the standard used for determining design loads, including snow loads. Local building departments use these maps and local amendments to set roof load requirements.
If you hear cracking sounds, see sagging ridges, notice doors suddenly sticking, or find new ceiling cracks after heavy snow, leave the building area beneath the roof and call a professional. Those are structural warning signs, not maintenance items.
A basic winter roof kit can include a roof rake, heavy gloves, a headlamp for attic checks, spare downspout extensions, and a camera for documenting damage after storms. Good photos taken immediately after wind, hail, or falling branches can help a roofer identify the source before weather erases the evidence.